Sunday, May 2, 2010

Gold!


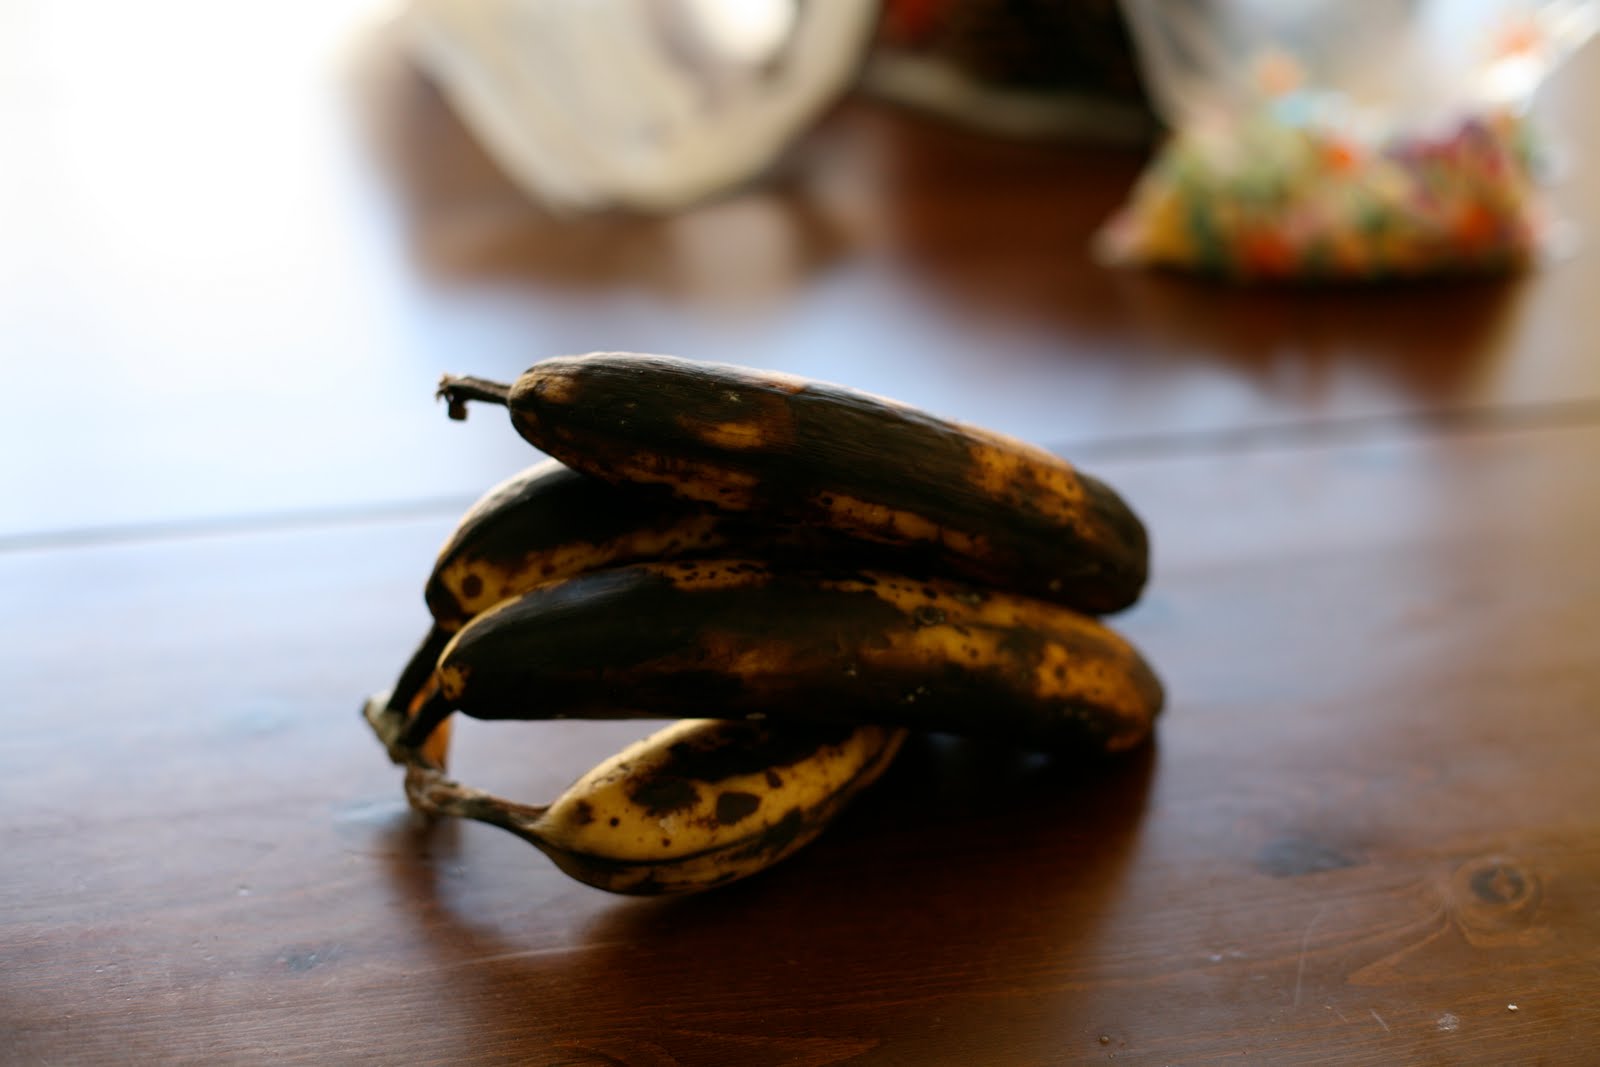
If you read this little blog you would probably think that I only eat bananas and baked goods.  I eat other things too, I swear.  But when Gold, I mean ripely brown bananas protruding with sweetness magically appear on my door step, I can't let them go un-baked.  (Thanks Brynn)  I make several Banana Bread recipes all with a slight variation either with chocolate chips, crystallized ginger or whole wheat flour.  But this time I decided to go with a classic James Beard Banana Bread Recipe.  It has the least amount of ingredients and least fuss of them all.  It is a little bit lighter and less sweet which is perfect for breakfast.  I don't like eating sweets in the morning when I wake up.  They leave my stomach a little unsettled all day.


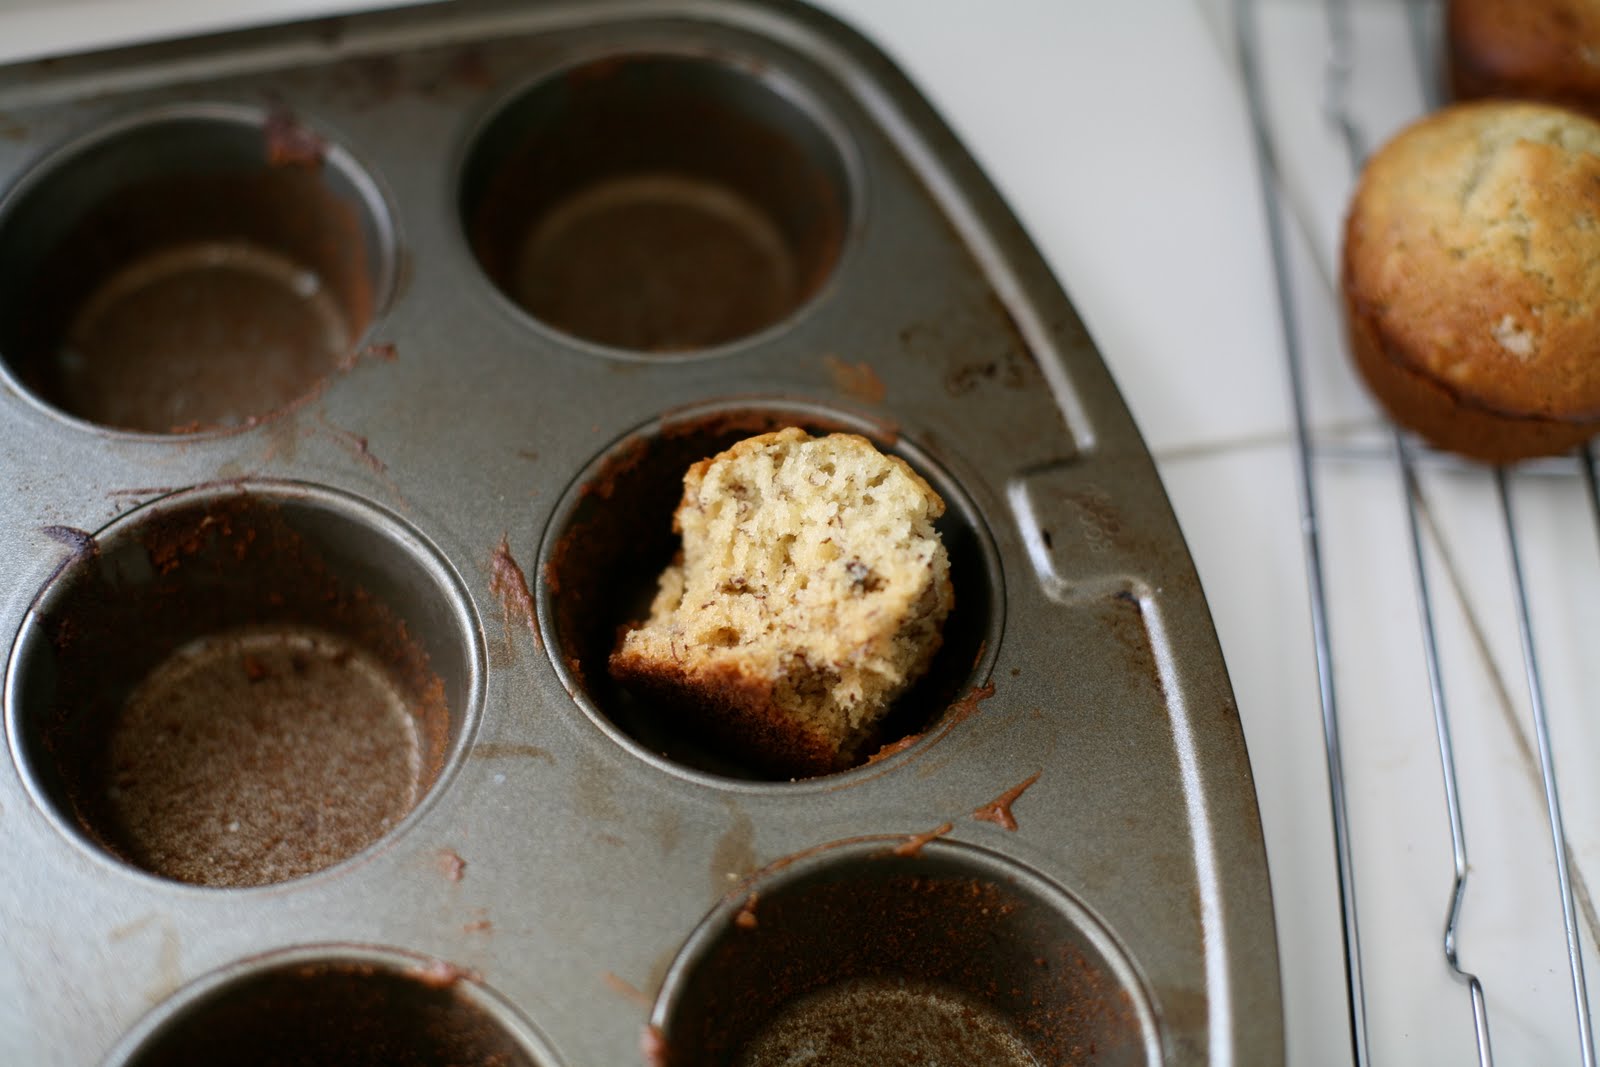
I am still trying to decide if I like sweet breads made into muffins or a loaf.  The muffins cook faster and are easy to take on the go.  But the bread is moist, sweeter and crunchier and way more grown up.  I pretend to be grown up and responsible but all I really want to do is be a kid and go play in the backyard.  Can I get paid for that?  So I make both!  A happy medium, but I hate cleaning that muffin tin especially when I run out of muffin papers.  


Banana Bread

Ingredients:

½ cup (1 stick) butter, at room temperature
1 cup sugar
2 eggs
1 cup mashed, very ripe bananas (2 large or 3 medium)
2 cups all-purpose flour
1 teaspoon baking soda
½ teaspoon salt
1/3 cup milk
1 teaspoon lemon juice
½ cup chopped walnuts or pecans

Steps:

Preheat oven to 350°. Lavishly butter or Crisco a 9-inch x 5-inch x 3-inch loaf pan.

Cream the butter and gradually add the sugar. Mix well. Add the eggs and mashed bananas and blend thoroughly. 

Sift or mix together the flour, baking soda, and salt. Combine the milk and lemon juice, which will curdle a bit.  Slowly and alternately fold in the flour mixture and milk mixture, beginning and ending with the dry ingredients. Blend well after each addition. Stir in the nuts.

Pour batter into the pan and bake for 45-50 minutes, or until the bread springs back when lightly touched in the center.  For muffins bake for 15 - 20 minutes.

Monday, April 19, 2010

Ready Set Eat


To Grandma’s house we go. Always something new to us to eat always at least 100 years old to Grandma. Something new to learn and always way too much to eat. This time it was (let the drum roll begin): minced beef roast sandwiches; banana nut cookies; manicotti stuffed with meat, spinach, onion, ricotta and parmesan; shrimp salad, bunt Cake with Brown sugar topping, overnight soaked French Toast, Ham, Scalloped potatoes, guacamole. Lot’s of wine and drinks. And that was all in about 24 hours.

But from this trip I took Banana goodness cookies. I have no clue where this recipe originates. But apparently it’s 100 years old and pretty good. The only deviation from the recipe was that I used butter instead of margarine. I don’t even know where to buy that stuff! The butter made the cookies taste a little sweeter and not as crunchy. I would probably add another 1/4 to 1/2 cup of rolled oats to the batter as well.


Another addition to this blog is pictures taken with my new camera. Well it isn't that new anymore, I got it a couple of months ago. But I have been so busy with work and living that I haven't had a chance to sit down and document my adventures in the kitchen. But I love this camera! It's a 5D Canon, I bought a 50 mm 1.4 lens for the camera. It's been a lot of fun so far. I still need to sit down and figure out how to really use the camera too.


Banana Cookies

Cook 10-12 min at 400

3/4 cup margarine
1 cup sugar
1 egg
1 1/4 cups flour
1 cup fine mashed bananas
1/2 cup nuts or dates
1/4 tsp salt
1/2 tsp baking soda
1/2 tsp nutmeg
1 1/2 cups rolled oats
1 6 oz pk butterscotch chips

Cream margarine (butter), sugar and egg with a hand mixer.  Add flour, salt, baking soda, and nutmeg.  Beat.  Add rolled oats, bananas, butterscotch chips and nuts. 

Wednesday, January 27, 2010

A Little Bit of This...A Lot a Bit of That....

While working in Yountville and managing a wine tasting room, pretty much the best part of my every day is Not the incredible wine I get to sell and taste every day, but the delivery of warm, baked, beige and brown, crunchy on the outside, moist and fluffy on the inside goodness that TK's Bakery makes every day. I am referring to Bouchon Bakery, by Thomas Keller, pretty much the best Bakery on the face of this earth (expect for Beverlywood Bakery, Chocolate Round, West Sider's know what I'm talking about).

Keller, as the story goes, shortly after he opened the French Laundry and Bouchon, wanted to have a Yountville bakery to supply his and other local restaurants breads and pastries on a daily basis. So every day the Bouchon Bakery delivery bike (yes a bike, with a giant, warming oven box on the front) comes by and delivers our epi baguettes to the tasting room for our featured Olive Oil tastings. At around 11:15, right around the time you are almost ready for lunch, the epi comes to our door fluffy and warm, almost with steam coming up as you break the bread apart. Pretty much the best snack ever!


We always have bread left over at the end of the day, and what better application of day old bread than delicious Chocolate Bread Pudding!!!!

The next evening, letting the bread get a little tougher, I spent all of 10 minutes putting this delicious goodness together. The recipe is an adaptation of Paula Deans incredibly unhealthy recipe, making it with just a little less butter. A friend passed this recipe on to me, but failed to provide me with exact ingredients, so if you feel there is too much of one thing (sugar) and not enough of another (Frangelico/Vanilla) ... feel free to add your own twist.


Chocolate Chip Bread Pudding

1-3 day old French Bread
2 cups Milk
1/2-3/4 cup Heavy Whipping Cream
1 1/4 cup Sugar
3/4 cup Brown Sugar
2-4 handful of Chocolate Chips (depending on how big your sweet tooth is)
4T Frangelico
1-2T Vanilla Extract
Butter cut into cubes for top of pudding

5 eggs - optional if you want a custard like dish or exclude if you want creamy milky bread - either way is good.


Pre-heat oven to 350 degrees

Break up bread into small chunks, enough to cover a 9x13 pyrex
Combine all above ingredients, except for butter (egg is optional)
Pour over bread chunks
Let sit for 15 minutes
Put cubes of butter over top of dish
Bake for 45 minutes or until golden brown on top

Friday, December 25, 2009

Chicken Perfection!

Growing up in a house where family dinner was mandatory every night, and you had to be there, and finish all your vegetables (which was very difficult at the age of 7).... making a yummy, warm, and extremely easy dinner every night has become the ultimate homesickness cure... especially the chicken soup from an earlier post. For me it has always been dads quick grilled rosemary garlic chicken. Dad would always fire up the grill, rain or shine, but never to make burgers... it would be steaks, chickens, fish, veggies... the ultimate hassle free method of cooking.

Now, living away from home, and grill-less... I have tweaked this recipe to oven roasted perfection! Along with roasted tomatoes, steamed veggies, and Rice-A-Roni Rice Pilaf to complete the dish.


Ingredients for 2+ servings

Chicken breast - unthawed - how ever many desired
Olive Oil
Dried or Fresh Rosemary
Minced Garlic
Red Pepper Flakes
Salt and Pepper to taste
Cherry Tomatoes


Directions

- Preheat oven to 450 degrees (yes sounds a little high, but its the perfect temperature!)
- In a smallish bowl, place cherry tomatoes, and coat with olive oil.
- Place chicken on a pan lined with aluminum foil and coat both sides with olive oil.
- Sprinkle on both sides of chicken and tomatoes - salt, pepper, rosemary, minced garlic and pepper flakes - All to taste. (A little of the pepper flakes can go a long way)
- Place in oven and cook for 18-19 minutes, no longer or it will quickly dry out.

Serve with veggies and rice or whatever else you desire and enjoy!!!

**Note - You can alter the spices in this recipe to whatever you desire... mustard/tarragon, Italian Spices, bread crumbs... you name it, just keep the temperature and length of time the same always!

Thursday, December 24, 2009

Weeknight Dinners


Huevos Rancheros, ranch style eggs, what makes these ranch style except that they are quick and semi-hardy, but aren’t all eggs quick?  Anyways I love making these and I love eating these for breakfast, lunch or dinner.  I probably eat this eat at least 3 times a week for any of those meals, although I usually make them for dinner.  It is a very nutritious meal that combines all the food groups.  Protein, carbs, vegetables and I’m sure there are others I don’t know about.  But that isn't really why I eat them.  I make them so often because they are so freakin' good. 
 
Lately, I’ve been experimenting with flour tortillas, corn tortillas and pita.  I have to say that pita is the best and easiest to eat.  The corn tortilla sometimes gets too crisp and it is hard to cut with your knife.  The pita on the other hand remains easy to cut no matter how long you cook your eggs.  This usually becomes a problem for me because I cook my eggs for a long time.  I like them done.  Well done.  No oozy yellow or whiteness seen on my plate.  But that is my opinion and obviously you can make them how ever you want.  I think these are best with sharp cheddar cheese, but you can also use any other hard cheese such as jack or monterey.


What keeps me making this dish over and over is the fresh homemade salsa.  It is very simple; tomato, red onion, lime juice and salt.  It is so yummy and if you can make this salsa a few hours ahead of time it is even better because the time allows the red onion and tomato to absorb the lime juice and salt. 


Overall this dish is really quick to make, heat a small amount of oil in a pan and fry the tortilla for a few minutes, flip, sprinkle cheese, drop an egg on the tortilla, let it set, flip and let cook to your liking.  Place tortilla on plate and add more cheese and salsa.  You can add black beans or a few slices of avocado also.  I have been putting avocado on mine recently.  (whippie for $1 avocados)


A few tricks I've learned from making these.  You're pan can be too hot!  Cook over medium heat to avoid burning.  When about to flip your tortilla or pita, do it quickly and it doesn't matter that you break the yolk.  I actually almost prefer it that way.


Ingredients for 1 serving

1 tortilla
1 egg
shredded or slice of cheddar cheese
1 tomato, chopped
1/4 cup chopped red onion
1/2 lime
sliced avocado
canned black beans
olive oil
salt and pepper

Directions

Salsa
1. Slice tomato and red onion, place in small bowl.
2. Squeeze half lime into bowl.
3. Add few shakes of salt, mix.

Huevos
1. Heat small amount of oil in pan over medium high. Fry tortilla for a few seconds on each side.
2. Place cheddar cheese on tortilla, let melt for a few seconds.
3. Crack egg over tortilla and cheese. Season with salt and pepper
4. Cook for a few minutes, until egg yolk starts to set. Don’t let burn.
5. Flip egg and continue to cook on opposite side until liking.
6. Place on plate, egg side up and place beans, salsa and avocado slices. Serve with knife and fork. You can also put more cheese, use sour cream, jalapenos, meat on your huevos rancheros.


Thursday, December 3, 2009

Tissues and Soup


Sickness ugh. Sneezy, sniffly, congested, muffle head yuck. I don’t get sick often. In fact I can’t even remember the last time I was truly sick. But these past few days have been pretty bad. On a scale of 1 to 10 with 10 feeling healthy, I am at a 6. Not totally incapable of working, but definitely in need of tissues and medicine at all times. I’m not sure if it is the new environment that I am working in (extreme dust and bad air circulation) or that for the past week during my Thanksgiving break my body and mind was able to relax a bit and not constantly think and work and now going back to work, I have shocked my body and it is negatively reacting to work. I’m pretty sure it is not the latter reason. But I like to blame things on my work causing the things that happen to me that I don’t like in life.


Anyways, my not feeling well caused me to run to the store during my lunch break to buy behind the counter sudafed (do not buy sudafed PE found on the shelves, it does not work, go to the pharmacy and ask for sudafed, the only way to go), Afrin and chicken noodle soup makings. I love chicken noodle soup. It is definitely in my top 5 soups to eat with tortilla soup being number 1, pea soup, roasted tomato soup and corn chowder mixed in there. I probably make chicken noodle the most of my favorite soups because it is the easiest, quickest and uses the fewest ingredients. Every time I make this soup I use a different recipe, but it almost always turns out the same. But this time I think that I found one that I will keep on making. It is Tyler Florence’s Chicken Noodle soup recipe.

First you boil some chicken until done, saute vegetables, add chicken stock, add noodles, then add chicken throughout the cooking process. After all this in about 30 minutes you have warm, comforting chicken noodle soup and I did feel a lot better after this meal.

Ingredients

1 tablespoon extra virgin olive oil
1 medium onion, chopped
3 cloves garlic, minced
2 medium carrots, sliced
2 ribs celery, sliced
1 bay leaf
2 quarts chicken stock, or 5 cans of chicken stock (reduced sodium)
8 ounces of dried wide egg noodles
2 chicken breasts boiled and shredded
salt and pepper

Directions

1. In a large sauce pan heat and add oil over medium heat. Add the onion, garlic, carrots, celery and bay leaf.
2. Cook and stir for about 6 minutes, until the vegetables are softened.
3. Pour in the chicken stock and bring the liquid to a boil.
4. Add the noodles and cooked until tender.
5. Add chicken and continue to simmer for a few minutes. Season with salt and pepper.

Sunday, November 15, 2009

My beginning

Here is the beginning of our Blog.

The idea is simple, I cook a recipe, post. Allison cooks a recipe and she posts. There is no order to our posts, we post whenever our busy lives calm down for a second to give us time to enjoy the things that really matter to us.

We are doing this to document our recipe findings on the internet, magazines and conversations with friends. We have no training what-so-ever. Except that we have been taught from a very young age that with the right ingredients and patience you can cook anything and usually better than the average restaurant.

So here we go, let the conversation begin, and may our kitchens constantly smell of warm baked goods or garlicky goodness.